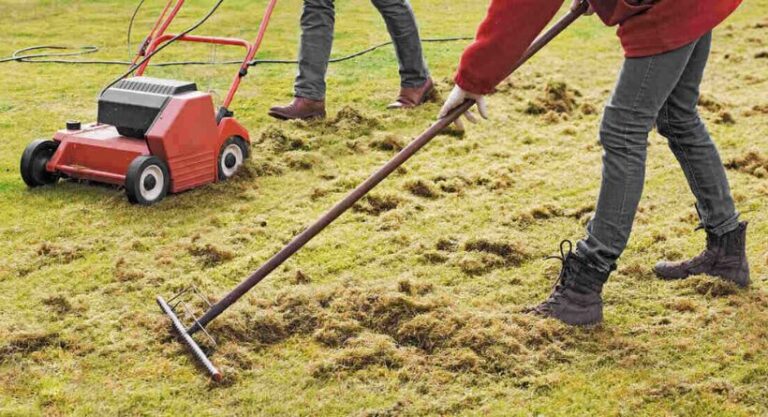
Here is a DIY that will help you create your own lawn dethatcher if thatch growth is harming your grass. This page covers both of the available thatch removal options.
How to Make a Homemade Lawn Dethatcher
Thatch on a lawn is the accumulation of organic matter underneath the grass, such as pine needles, decomposing leaves, and grass clippings.
The majority of the time, this trash will naturally degrade without any issues, but if it doesn’t, your grass will seem uneven and messy. This yard labor is just as crucial as learning how to eradicate weeds from lawns, flowerbeds, and courtyards.
The organic decomposition of thatch may be slowed down by factors such a cold environment, frequent mowing, and heavy fertilizer and pesticide usage.
When neglected, this thatch may prevent the grass from receiving the nutrients and moisture it needs to develop properly. Additionally, the grassroots may start to develop upward rather than downward.
There are two approaches to solving this issue:
- Physically removing the thatch layer, and
- Encouraging the thatch’s organic breakdown
And doing both of them is unquestionably the superior option. As a result, here is how to create two handmade lawn dethatchers: one for physical dethatching and the other to encourage biological dethatching.
Make Your Own Homemade Dethatching Rake
You must measure the thickness of the thatch layer on your grass before you start the dethatching process. No measuring tool is required; just insert your finger into the layer to determine its thickness.
Only when the thatch accumulation is more than half an inch thick is it advised to use the grass rake. Continue to the part that details how to produce a grass dethatcher spray if this is not the case.
There are several lawn dethatching rakes on the market, but if you like DIY, you can construct one fast with a few inexpensive items:
- Two hardwood boards that are more than two feet long, two inches thick, and at least one inch broad.
- 10 at least 4-inch-long nails
- 5–6 2-inch-long screws or nails
To build the handle, use a pipe or wooden pole that is four to five feet long.
Instructions:
As illustrated in the illustration below, take one of the wooden planks and hammer the four-inch-long nails into it. They should be around 1.5 to 2 inches apart from one another.
To ensure that the rake’s spikes stay at least 3 inches long if you’re using a thicker piece of wood, you’ll need to purchase longer nails.
As indicated in the figure below, lay the second wooden board on top of the first one and attach them together with the 2-inch-long screws or nails.
Your DIY lawn dethatching rake is nearly finished; the handle only needs to be fixed. Here is how your final rake ought to appear.
For Dethatching Your Lawn, Use a Rake
There are a few minor considerations to make whether you’re using a professional lawn rake or your own DIY one.
- You shouldn’t physically dethatch your grass too often since doing so will harm it more than benefit it.
- Keep the rake’s spikes inclined at a 45-degree angle to the ground when using it.
- Instead of digging the rake into the ground and uprooting your lawn grass, softly move it through the grass layer as though combing it.
- It is ideal to do dethatching when the soil and grass are just moderately damp, not entirely dry or completely wet.
- Early spring and late fall are the ideal times to do grass dethatching.
- Rake no patch more than twice, and move the rake in straight lines.
- Then, to assist the grass recuperate from the stress it has endured, water your yard.
Making a Lawn Dethatcher Liquid to Promote Organic Decomposing: Instructions
While dethatching your grass with a rake is effective, employing a DIY liquid dethatcher can hasten the breakdown of any leftover thatch. A dethatching liquid may be made using the following formula.
Ingredients:
- 12 pounds of sugar
- 12 cups of ammonia
- 12 can of beer
- 12 cup of dishwashing liquid
- 2 liters of water
Check the label of your dishwashing detergent to make sure it doesn’t include any anti-bacterial chemicals before combining the components.
You must modify these amounts to fit the size of your lawn since the amounts given here are about for a 100 square foot lawn. When your liquid dethatcher is prepared, use a hose sprayer to uniformly apply the spray.
The liquid used for dethaching will draw in microorganisms that aid in the thatch’s breakdown. The fact that all of the components in this liquid dethatcher are absolutely safe and won’t harm the soil or grass is its finest feature.
Water the grass three to four hours before misting this solution for the greatest effects. Additionally, don’t water the yard for the next 48 hours.


